Here is for photoshop-ers
Learning new skills or sharing their own sources
You may send mail to Avel for any help
You can order stuffs like you need
Timetable, memo pad or stickers etc.
You may take photos and tutorials but please,
DO NOT RIP OFF MY NAME, AVEL.
Bae Somi/Avel
Photoshop is everything for her.
ENTRIES
LINKS
TAGBOARD
PROFILE
ARCHIVE
Aug 8, 2008 Sixth Lesson : Snow or Rain ?
Hello, there!
I didn't post for too long, I guess. Okay, we are going to do something very simple for this lesson. Did you ever see snow in Singapore? I guess you saw raining, often, but I guess you just saw artificial snows . Today, we are going to control weather! YAY :D OK, not funny. Shall we start since you guys are not amazed by my lame-shit? :/ Okay, as usual, please open your image by going to File->Open / Double Click the background.  I opened this emo guy. I kinda like his adidas shoes :/ Okay, whatever! Now please new add layer and click the paint bucket tool. [: I am sure everyone know how to add layer and click paint-bucket tool. Okay, fill the new layer with black colour, please. 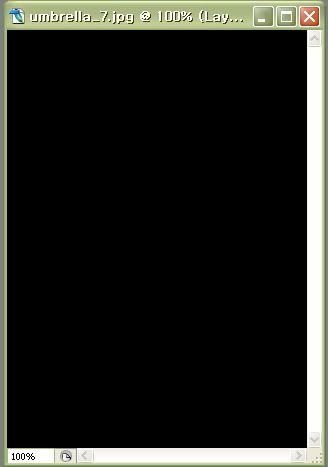 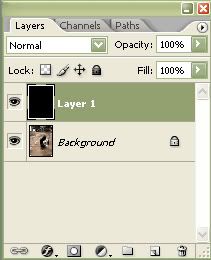 Now, please go to Filter->Noise->Add Noise. 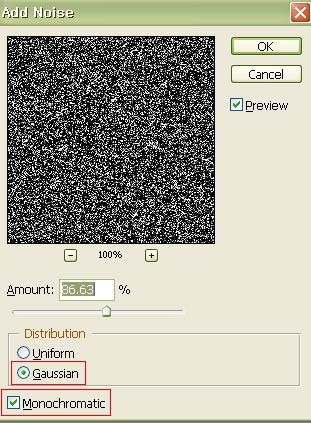 Please make sure that it is monochromatic [: and GAUSSIAN! Next, please go to Filter->Blur->Gaussian Blur. 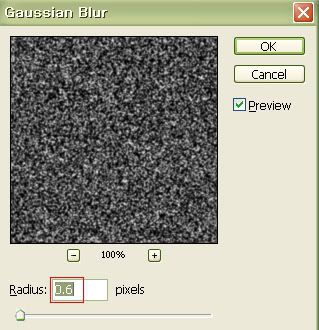 Around 0.4~0.7 pixels (: Then, go to Image->Adjustments->Threshold  Now adjust your own pixels. 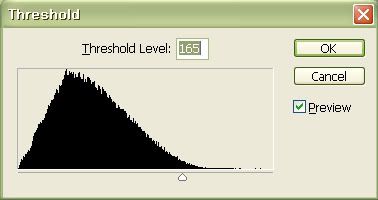 Then you will see something like this: 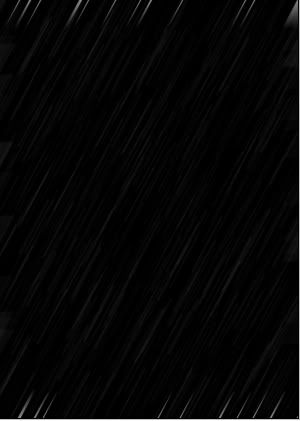 Now, go to Filter->Blur->Motion Blur. 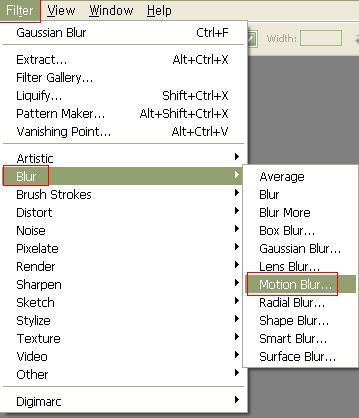 For Snow. 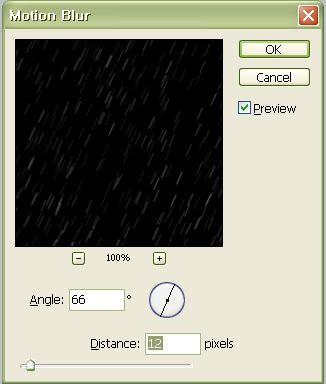 For Rain.  But this depends on your taste, as well! Then you will see something like this: Sorry for no captures this onwards. Please go to Image->Adjustments->Bright/Contrast. Adjust your own contrast&brightness , but please do lower the brightness and higher the contrast to show the white lines more. Change the mode to Screen. Then you will see the photo with rain/snow (:  Thanks. I know it's boring sials X: But next lesson is changing ppl's face, like what TIMO suggested me [: Okay, off! NIGHTS! May 29, 2008 Fifth lesson : Glittering image
Long time no lesson :D!
Okay, today we are going to do something similar like last lesson. We are going to make our pictures prettier, by making it glittering. Now, I am sure that you know how to open the image you want to. Press Ctrl+O or double click the background :) 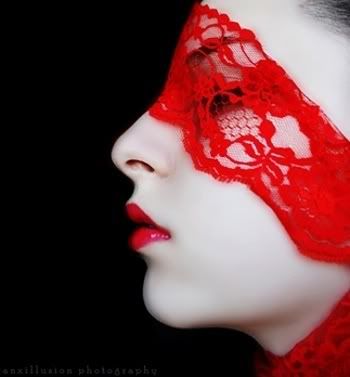 I recommend you to use black-based image today. I opened a model's image. You can open anything. Now open the image that you have saved, the black&white flowers. 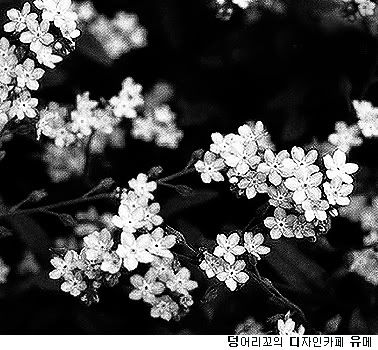 Now, using this tool  , just drag the flower image into your another picture. , just drag the flower image into your another picture.You will see something like this: 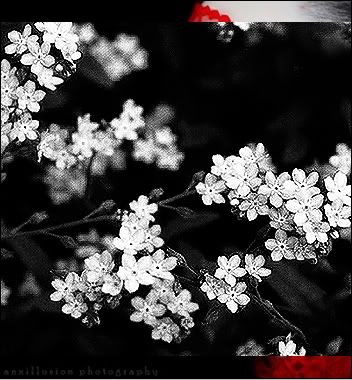 Now, by pressing Ctrl+T, adjust the size and location/angle and put it in your wanted-place (: 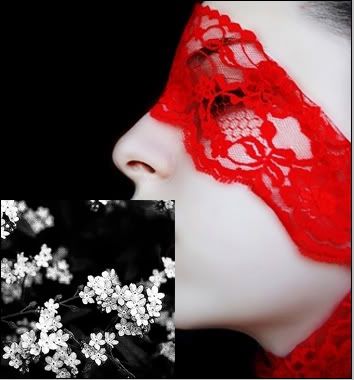 I did in such way. Now, choose the mode from your Layers window. Please change it to the Screen / Lighten Mode if your image is black background. You may change it by following your taste (: 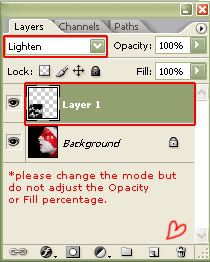 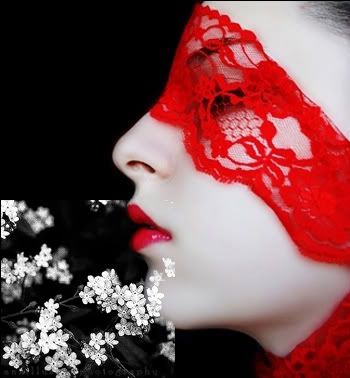 Now, Press Ctrl and at the same time, click the layer 2 (flower image). You will see that it's surrounded by moving dots like ants. Now, do not touch anything, just click new layer in your layer window. It's just beside your trash can icon! If you did it, press  and press Spectrum. and press Spectrum.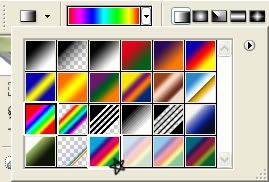 There are two spectrums but I recommend the one with star :D Now click it, and just drag it! Now, after you dragged it, change the mode to Overlay. 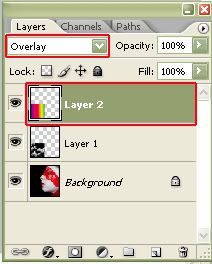 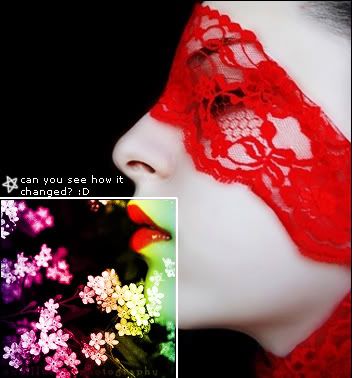 Now, press Marquee tool and select the edge of the flower picture. After you selected the area, please go Filter-Blur-Motion Blur 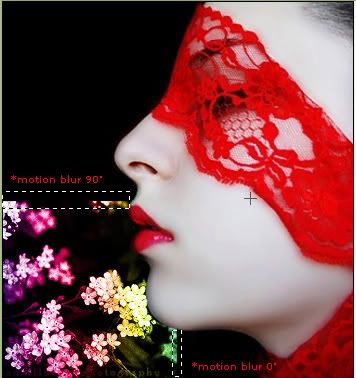 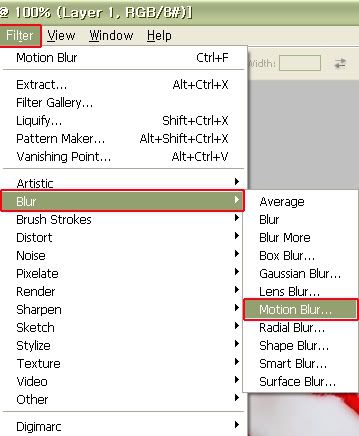 Please adjust the pixels according to your taste. Then you will see something like this:  Okay, now, press Sharpen Tool and sharpen the flowers and lips! It will look like it's glittering, and please be careful: Do not over-sharpen it!  Actually this is all! If you want to add some pictures and decorate them like what we have learnt last lesson, please to do so! I decorated like this:  You may enjoy your own way and if you have any time, please show it to me! laprincessa_amaryllis@hotmail.com or tag me at the tagboard menu and link your own blog where your own photoshop work is uploaded / posted. I will go see and tag you as well (:! Happy Photoshop-ing! [SAMPLE] : Glittering Image
Please save this image for next lesson.
Next lesson will be about making a glittering image :D Thanks! May 2, 2008 Fourth Lesson : Adding background image
Open your butter-man :DD image.
 Now, open (bring) the image of space background, that I have posted already. 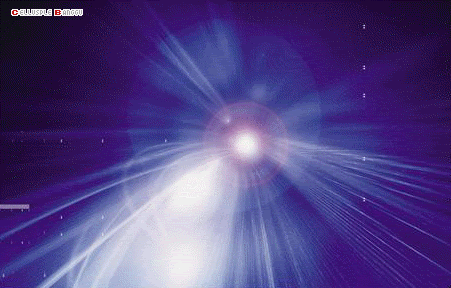 Press 'V' or click move tool and drag the background image to your model's picture. Now, do you remember how to adjust the size of the picture? Press Ctrl+T to tilt, adjust the size. Press Enter after you have adjusted the size. Please cover all the picture like this: 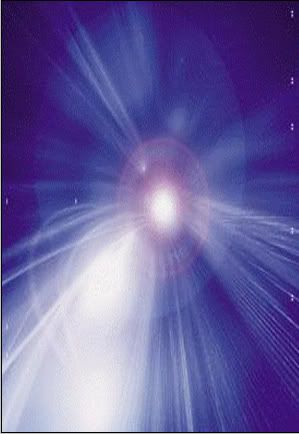 Then change the opacity to around 50%. 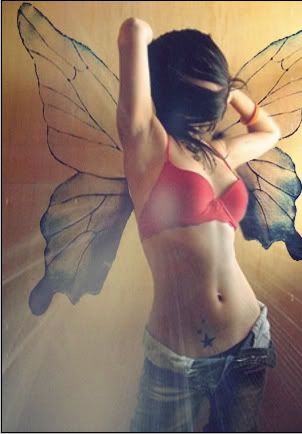 Press Ctrl+J to copy the layer and you may see that the space image is now much clear. 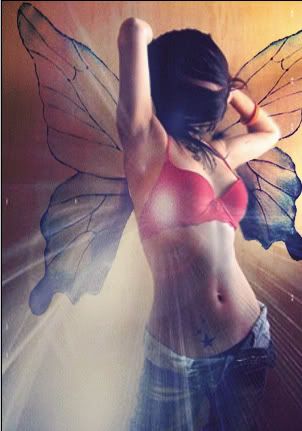 Now, select the Copied Layer and go to Filter->Render->Lens Flare  You may place the lens flare in your WANTED-place, and I recommend 35mm Prime Lens, as it's very clear than Movie Prime or 105mm. Let the brightness be 100% or you may adjust if you want. 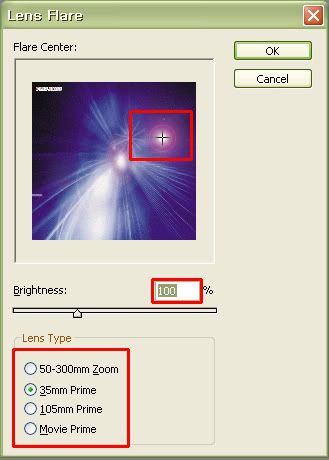 Change the mode to overlay of your Copied Layer and change the opacity to 100%. 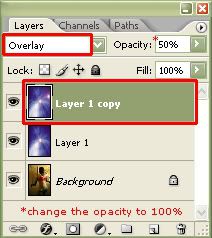 Tadaaaa! You managed to finish this! CONGRATULATION! 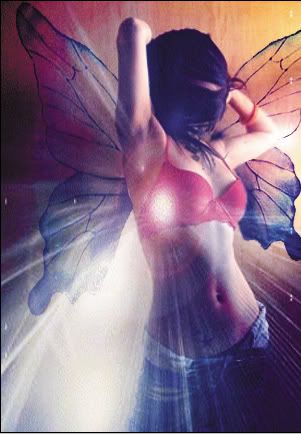 Good job, guys, next lesson, we are going to learn some more effects, and stuffs:D Great job guys, and see you later :D May 1, 2008 Third Lesson : Let's add wings on human back
Hello, guys, it's already third lesson !
Okay, I am only the one who's enthu. Never mind, okay, I added music player! :D happy ~ Now, we are going to something about genetic science. We are going to make butterfly-human: Butterman! Nice right :DDDDDD? Okay, Open your image of person. It's good to open who is not showing their back. Press Ctrl+O or double-click the background of photoshop. Bring your photo. 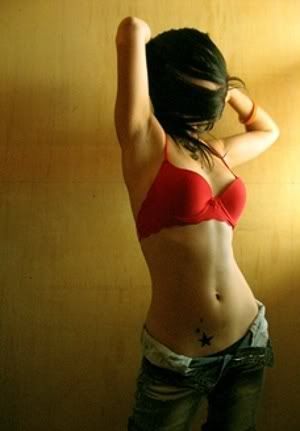 Now, bring your butterfly wing image. 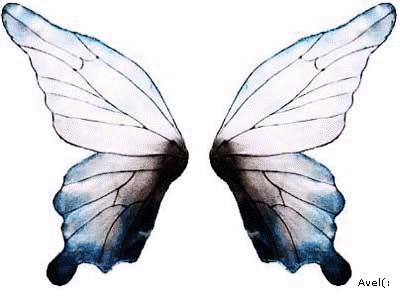 Press 'W' or click Magic Wand Tool. Click the empty space of wings (white part). 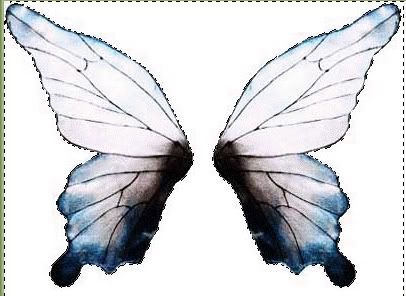 Yeah, something like that. Then press Shift+Ctrl+I / go Select-Inverse and you will see this: 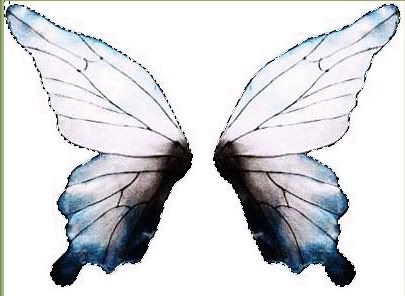 Press 'V' or click Move Tool and drag it to the picture of your model's. You will see something like this: 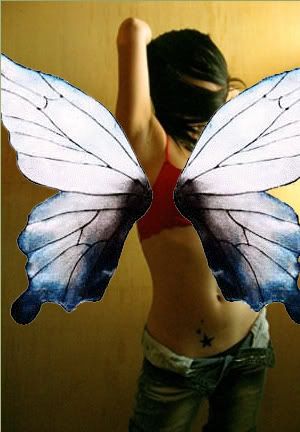 Click Marquee Tool or press 'M' and select one of the wings to erase away. To erase away, select the area and press Backspace. 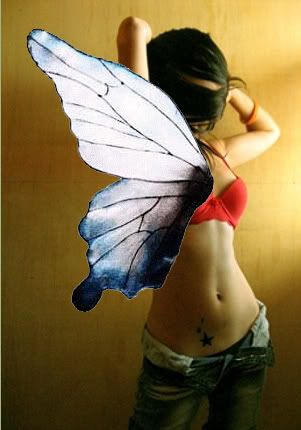 Press Ctrl+T in order to adjust the size and you may tilt it. Place the tilted/adjusted wing in appropriate place. 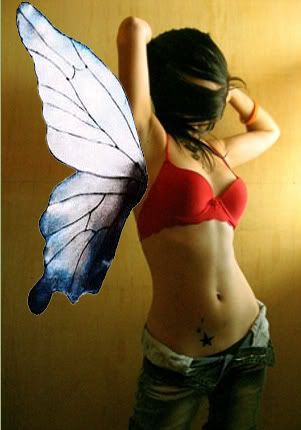 Change the opacity which is in your layers window. Opacity->40~50% Click the eraser tool and erase away the overlapping part. Change the opacity to 100% again and change the mode to 'Multiply'. You may change it to other favourite way. 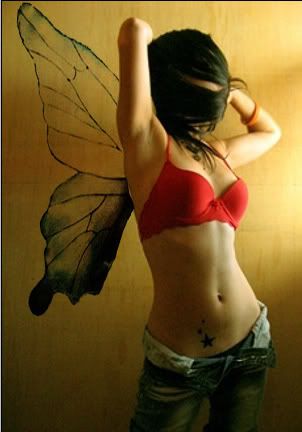 Repeat the above step to make other side of wings. YAY :D it's done! we will continue in next lesson, to mix other background images to make it nicer. okay, good job :D! [SAMPLE] : adding butterfly's wings
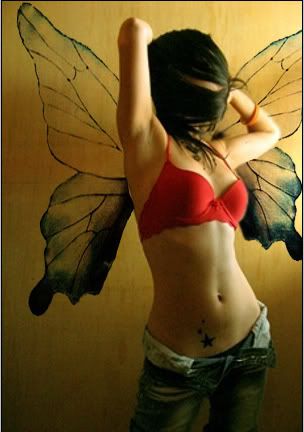
This is the sample for next lesson,
we are going to do photo decorating, by adding wings in the picture of model's. Here goes the sample: 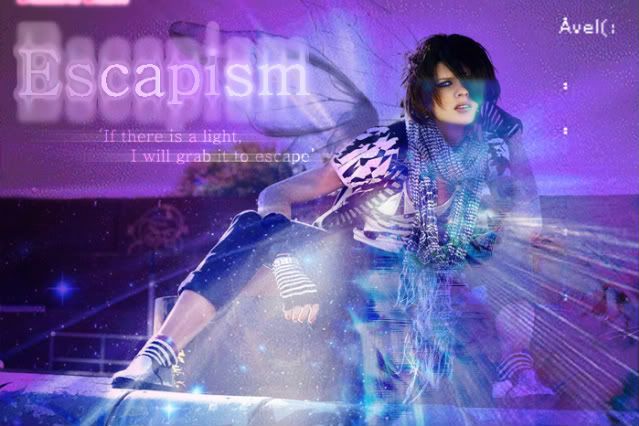 and please save the butterfly image that was posted before, the butterfly picture and space background. If you don't have any model's photos or portfolio, please take this image: no, no, don't have a dirty mind, this is a model's picture not more than THAT :D URLs: http://i283.photobucket.com/albums/kk316/avel_princess/escapism.jpg (sample) http://i283.photobucket.com/albums/kk316/avel_princess/a15.jpg (model pic) please take it with your tags in my tagboard. Thanks.
layout by: hilary
header by: avel Somi 1e3'o7* Jazmyn♥ Kevin(: Jia Ying Amanda.C Amanda.T Amanda.K Hadi L. Hui Min Nathaniel Sean Yi Qian Timothy Wei Xuan Zhanghui/Friendster C. Hui Min Xin Chen Wei Liang Xue Li Bethia Jia Hui Cassandra Jie Ying:Senior Edna:Senior Veronica:Senior LiTong:Senior MiaoChun:Senior SokChin:Senior Zoe:Senior PeiMei:Senior Irina:Senior Shubaa:Senior Ken:Senior Samantha:Senior Free chat widget @ ShoutMix
EMAIL: laprincessa_amaryllis@hotmail.com MSN: happykimjae-_-baesomi1994 BLOGGER: ISOLATION ANXIETY CYWORLD: The Best Damn Thing? WELCOME EVERY photoshop-ers:D Copyright (c) 2007-2008 HappyKimJae'* !/Avel/Somi   |